
📋 Setting up SSO via SAML - EntraID
This guide provides administrators with a step-by-step walkthrough for configuring Single Sign-On (SSO) via SAML in Microsoft Entra ID for the FTAPI server.
- Log in to the
Microsoft Entra Admin Center. - Navigate to
Entra ID -> Enterprise applications -> All applications. - Enter the name of an existing application in the search box and select the application from the results. Example:
Microsoft Entra SAML Toolkit. - Select
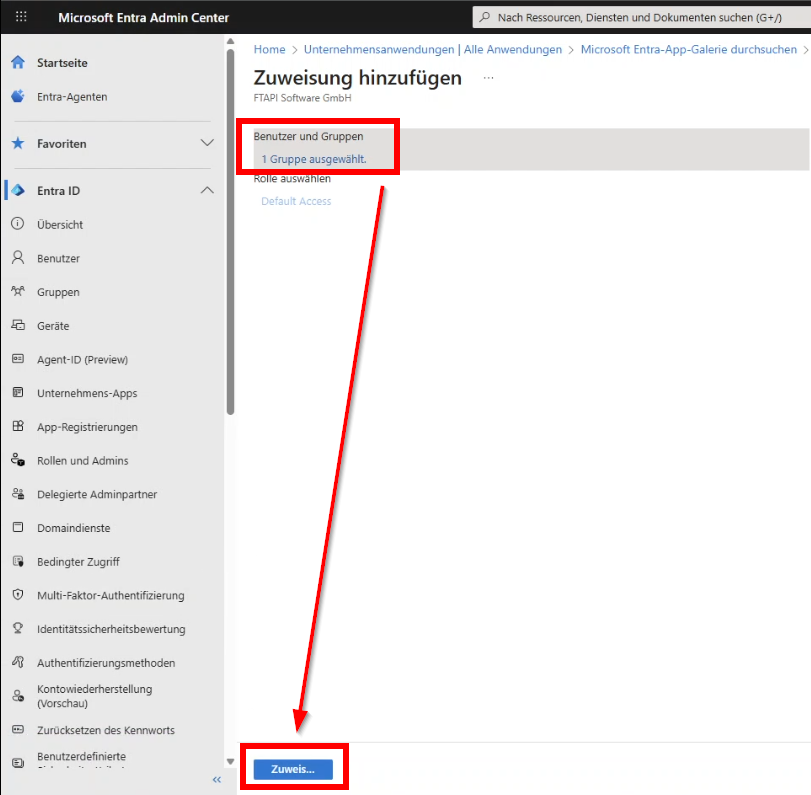
Users and groups->Add user/group. - Click on
None selectedand select one or more groups or users.
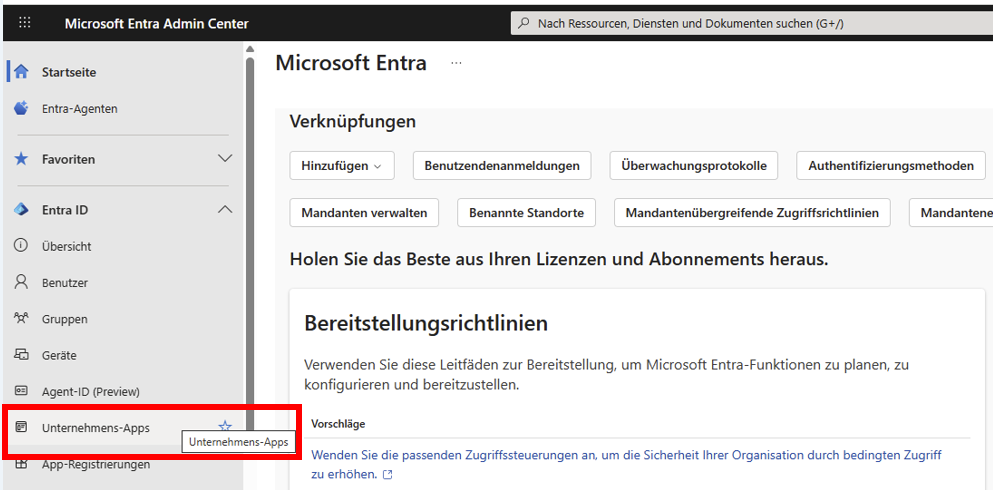
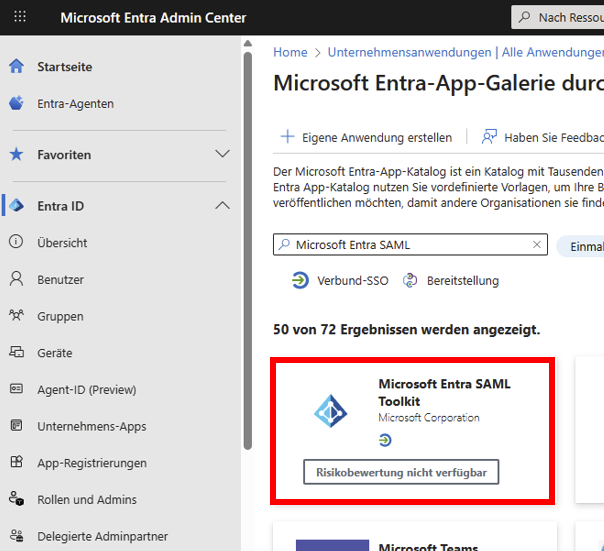
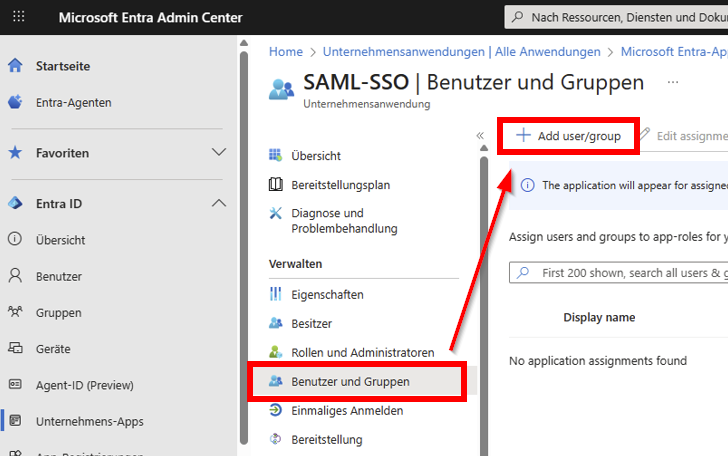
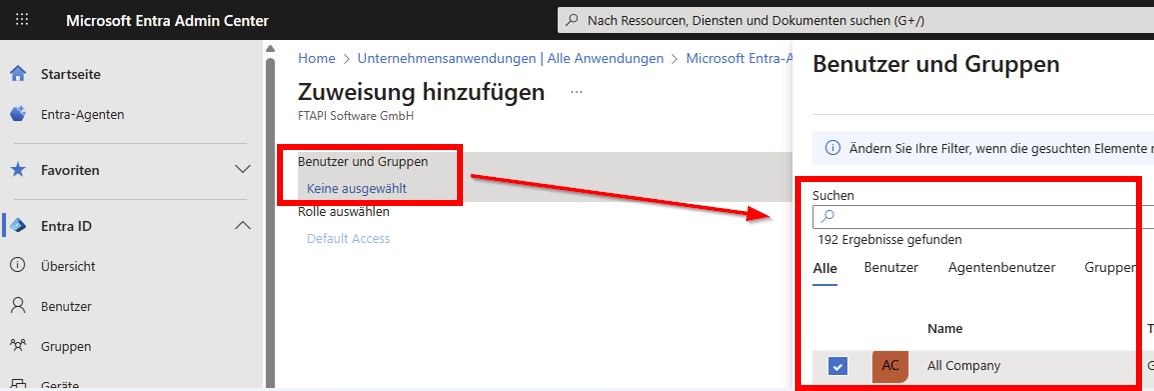
Now, users and, if your tenant has the appropriate license, groups can be added to the application via the search box. By clicking the Select button, users or groups can be added.
ATTENTION: Subsequently, the "Assign" button at the bottom left must be clicked so that the selection is assigned.
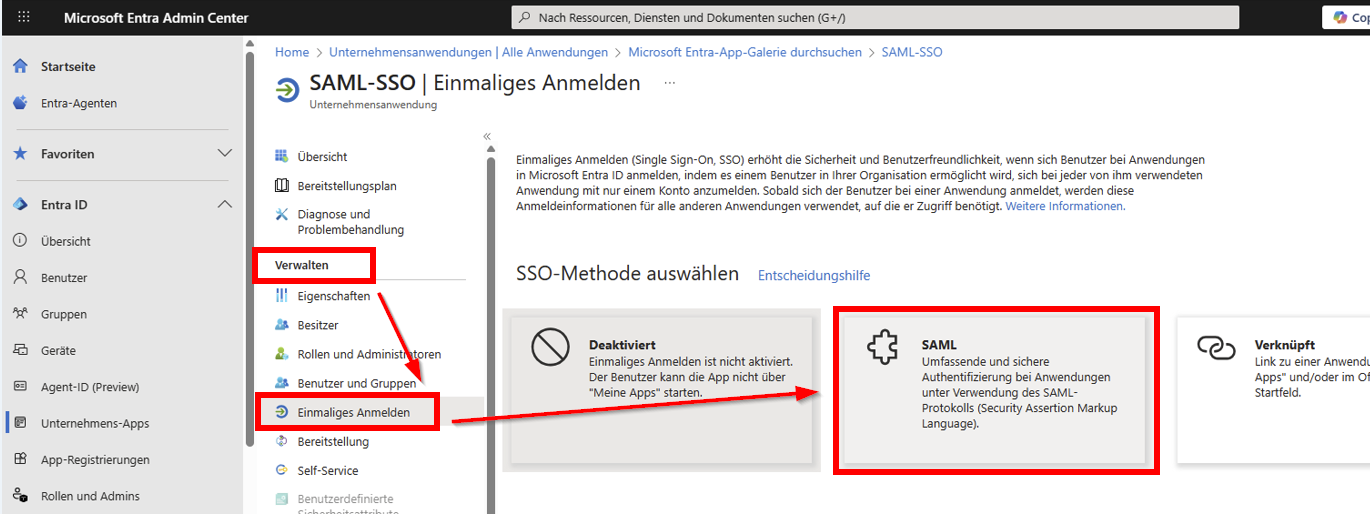
- In the
Managesection of the left menu, selectSingle sign-on. - Select
SAMLto open the SSO configuration page. - Under
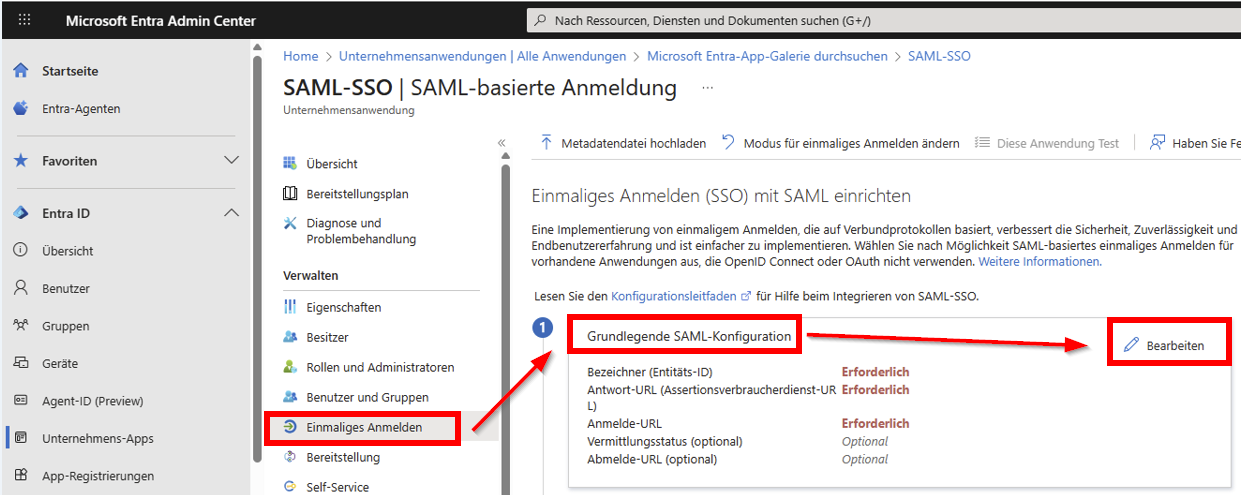
Basic SAML ConfigurationselectEdit.
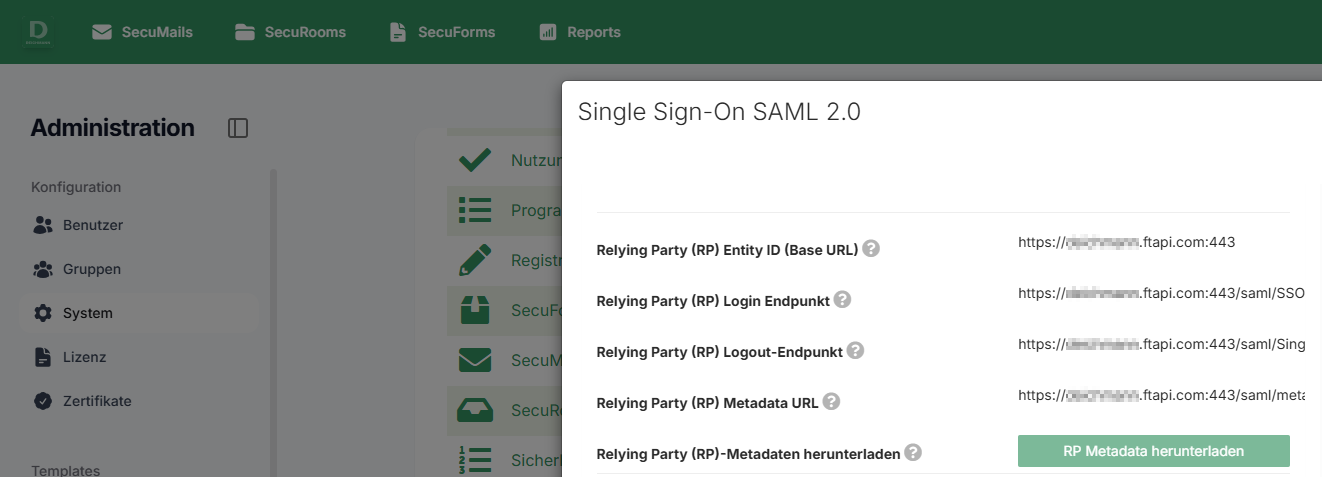
Clear the Identifier (Entity ID) field and enter the URL of the FTAPI server (e.g., https://transfer.ftapi.com) (1).
Then, in the Reply URL field, enter the URL of the FTAPI server + /saml/SSO (e.g., https://transfer.ftapi.com/saml/SSO ) (2).
Afterwards, save with Save (3).
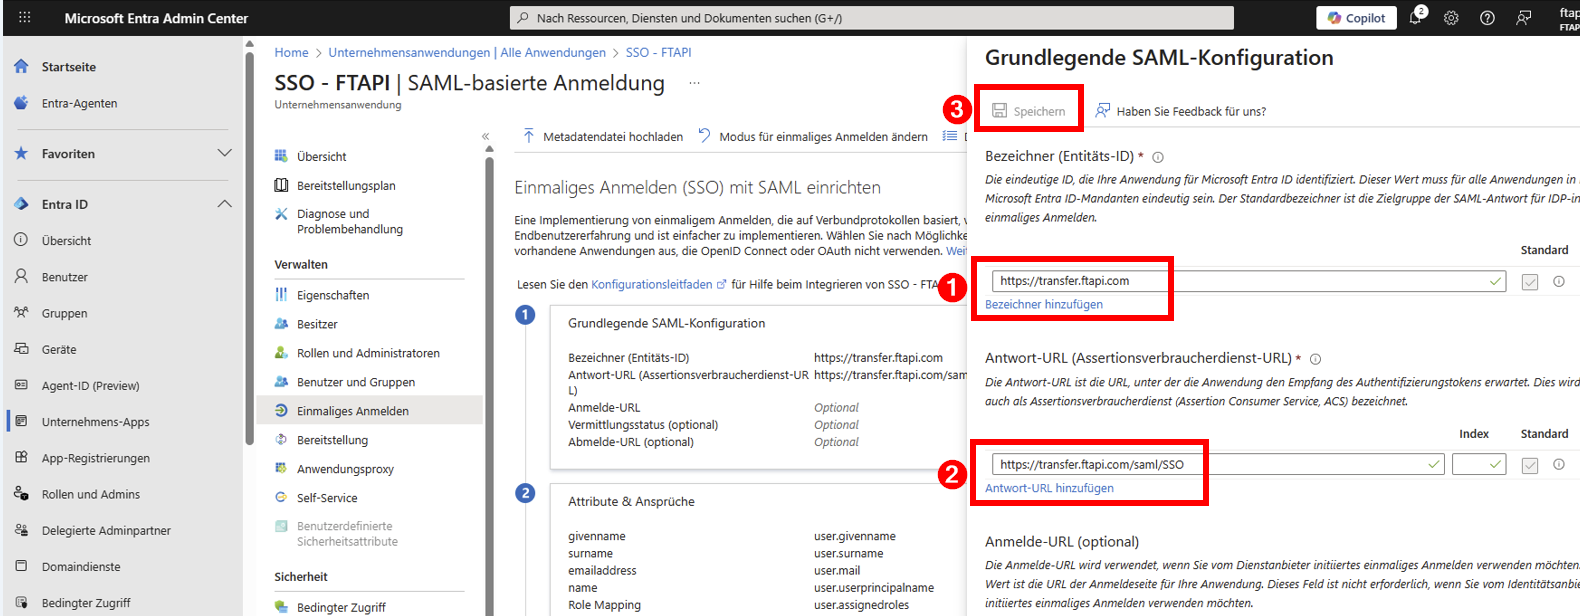
Please refer to the information in Administration -> Single Sign-On SAML 2.0 on the FTAPI server for the data of your FTAPI instance.
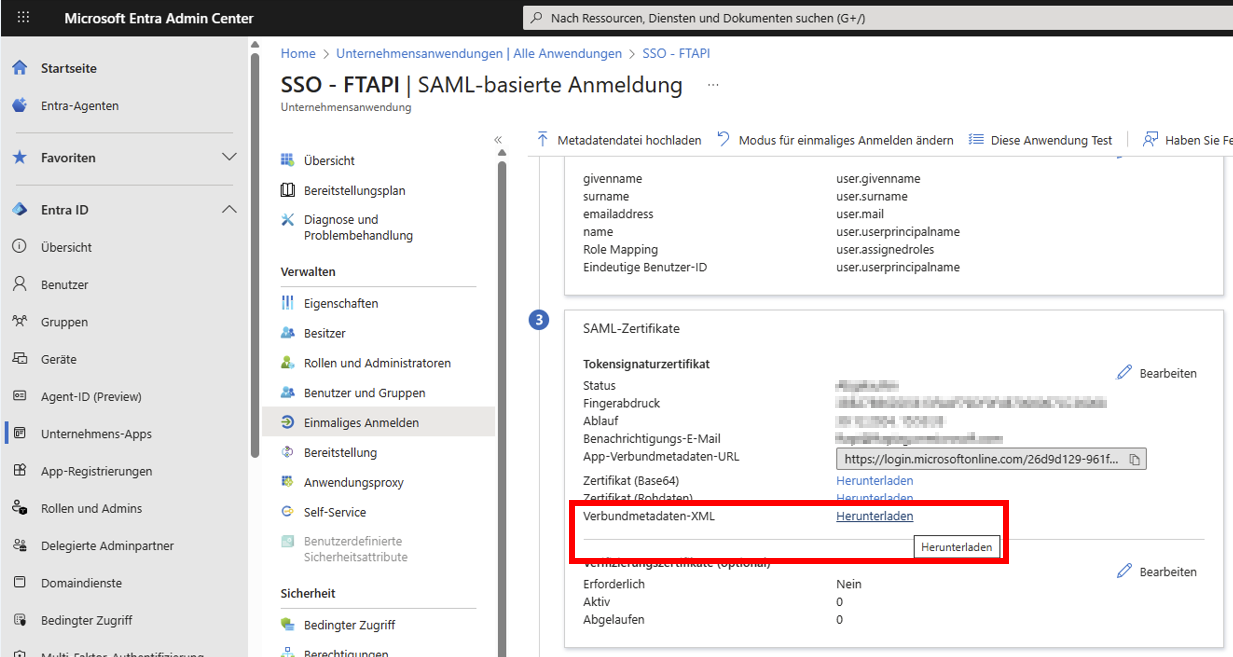
- Under
SAML Certificates->Federation Metadata XML, clickDownloadto download the metadata. These are required for the SAML setup on the FTAPI server.
Related articles
Initial setup of Single Sign-On