
📋 SSO: Setting up SAML Single Sign-On with ADFS
ADFS is a service provided by Microsoft as a standard role for Windows Server that enables web login using existing Active Directory credentials.
Requirements
For ADFS login to your FTAPI instance, you need:
- An Active Directory instance with an email address attribute for each user.
- A server running Microsoft Server 2016 to 2025.
- An SSL certificate to sign your ADFS login page.
Information on installing the AD FS role service can be found at Microsoft:
https://learn.microsoft.com/de-de/windows-server/identity/ad-fs/deployment/install-the-ad-fs-role-service
Adding a Relying Party Trust
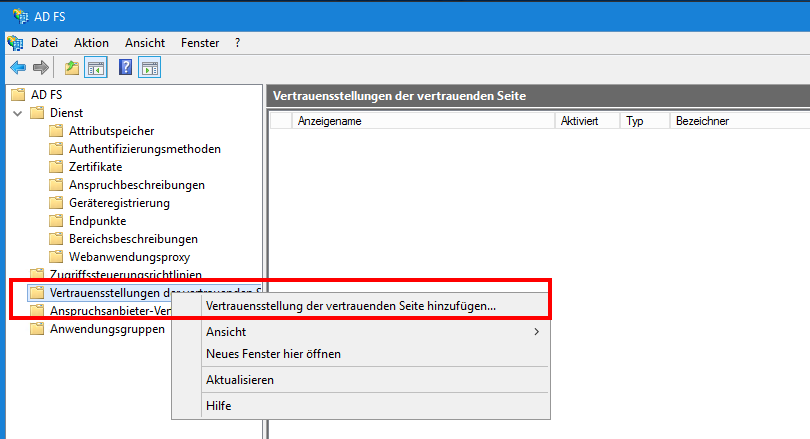
- In
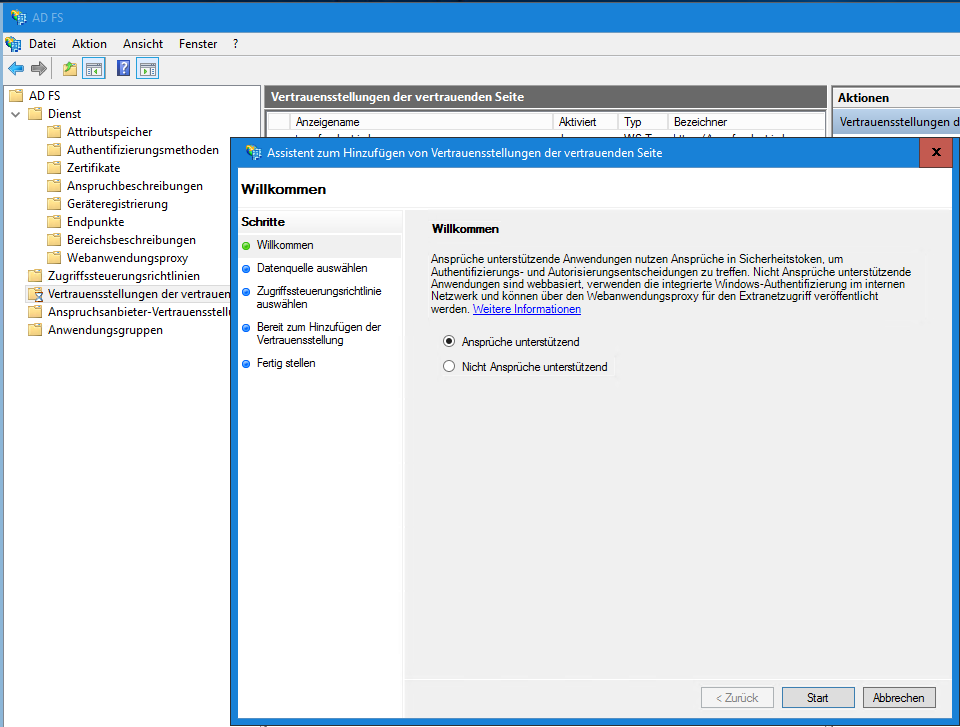
AD FS Management, select theRelying Party Trustsfolder and add a newRelying Partyvia the context menu (right-click) or theActionssidebar. The configuration wizard for a new trust will start. - Select
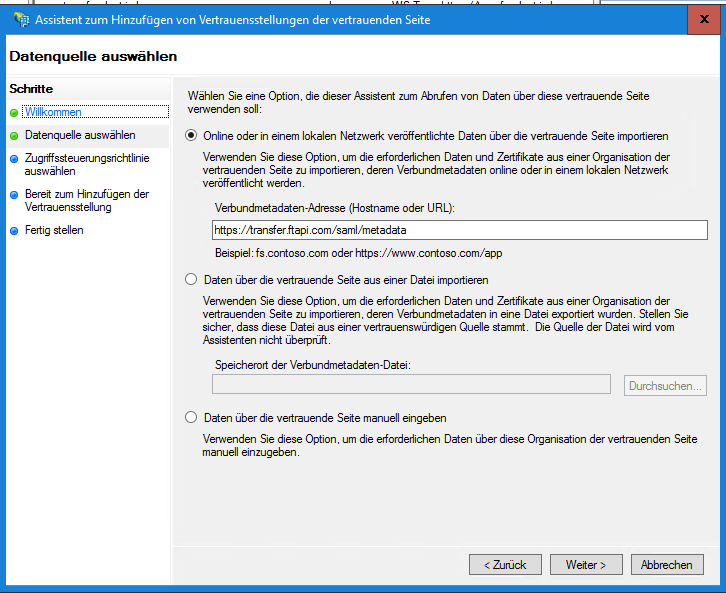
Claims awareand clickStart. - If the AD FS server has direct internet access, select the first option and enter the URL of your FTAPI instance with the suffix
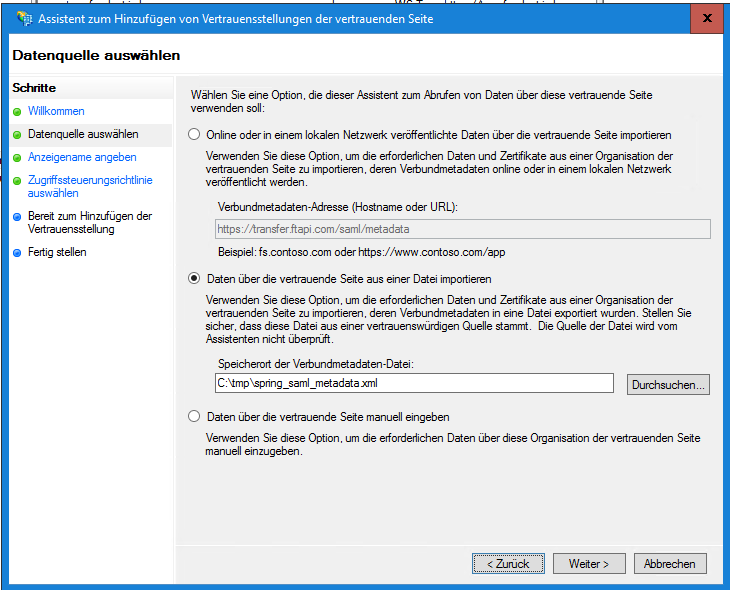
/saml/metadata. You can also find the URL in the administration of your FTAPI server underSingle Sign-On SAML 2.0->Relying Party (RP) Metadata URL. - If the AD FS server does not have direct internet access, download the aforementioned metadata and provide it under point 2
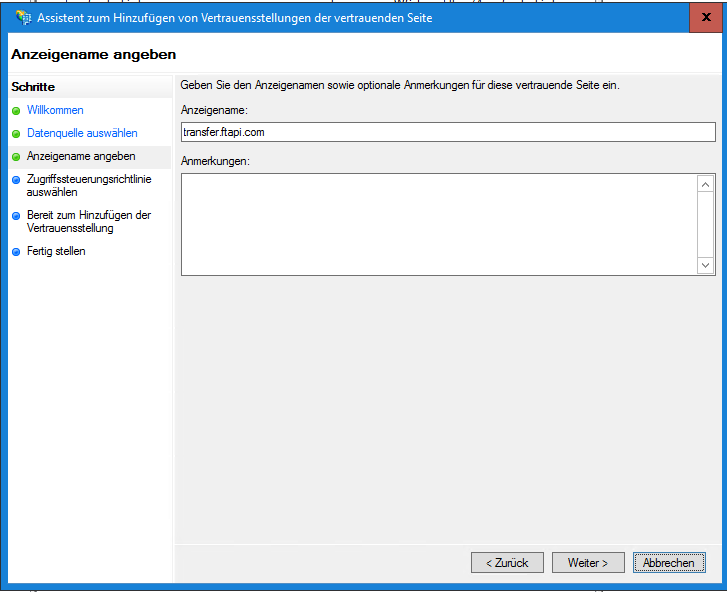
Import data about the relying party from a file. ClickNext. - Enter a unique name.
- Select
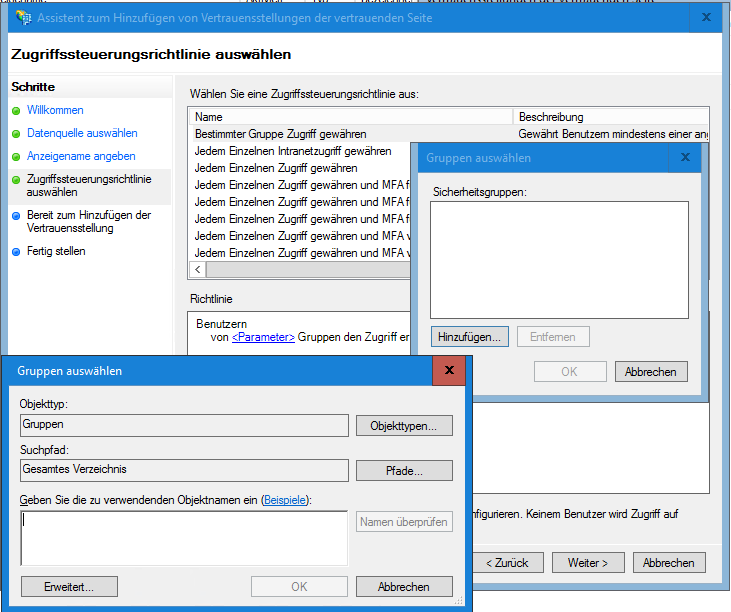
Permit everyoneorPermit a specific groupand click<Parameter>. In the window that opens, you can now select dedicated AD groups whose members should have access to SSO via SAML.
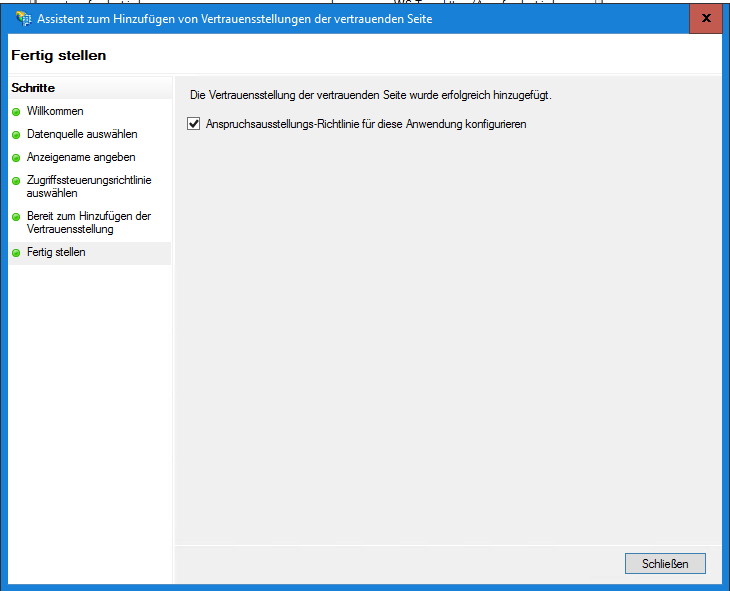
ClickNexttwice and thenCloseto finish the wizard and save the configuration.
Claim Issuance Policy
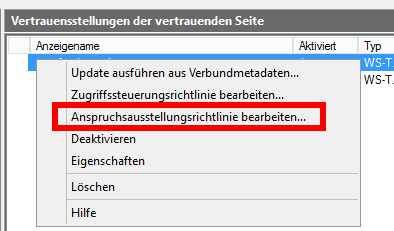
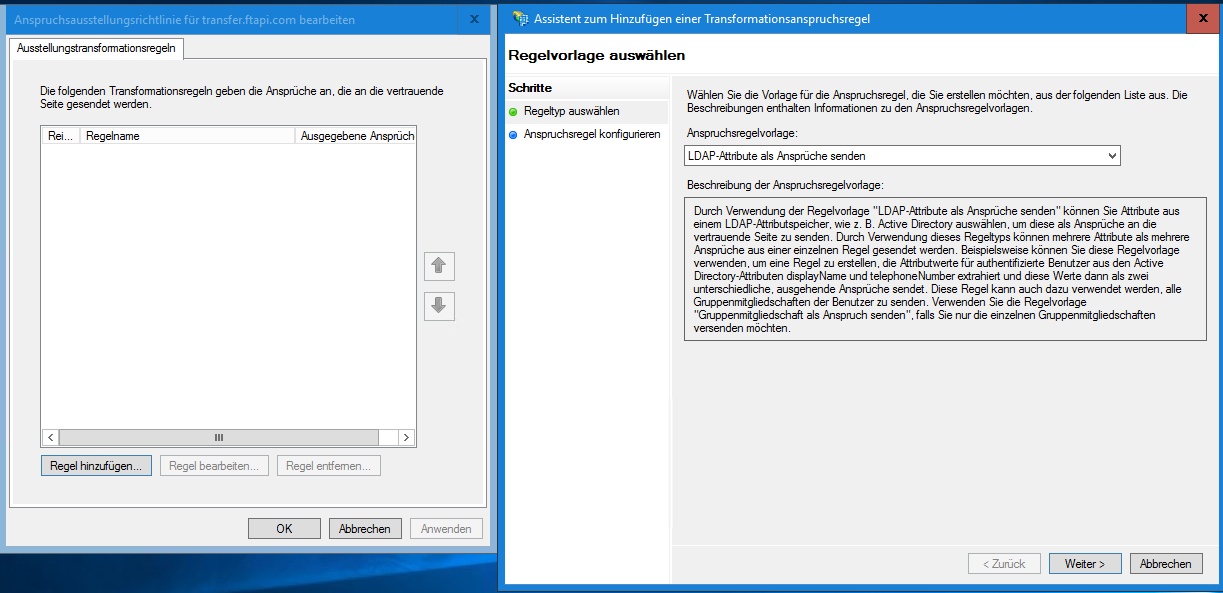
The Claim Issuance Policy opens automatically after closing; alternatively, right-click the newly created party and select Edit Claim Issuance Policy....
- Click
Add Ruleand selectSend LDAP Attributes as Claims.
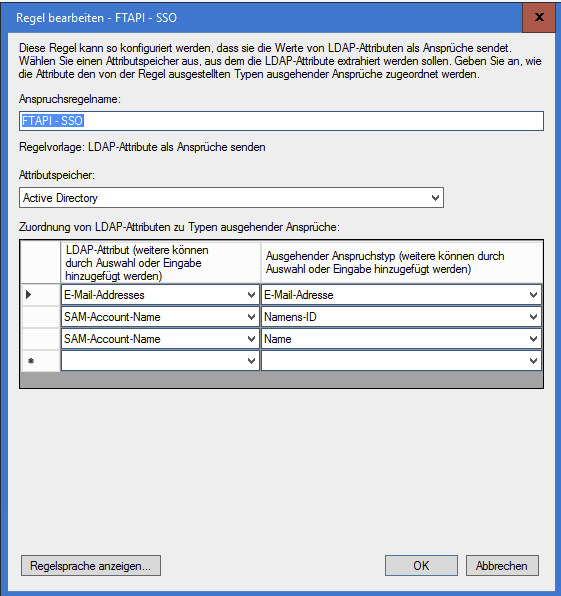
The claim rule name can be chosen freely, e.g.,FTAPI - SSO.Active Directorymust be selected as the attribute store.
The mapping should look like this:
If desired, further LDAP attributes can be configured (the FTAPI server also supports first name, last name, company, phone number, and position).
Group Mapping
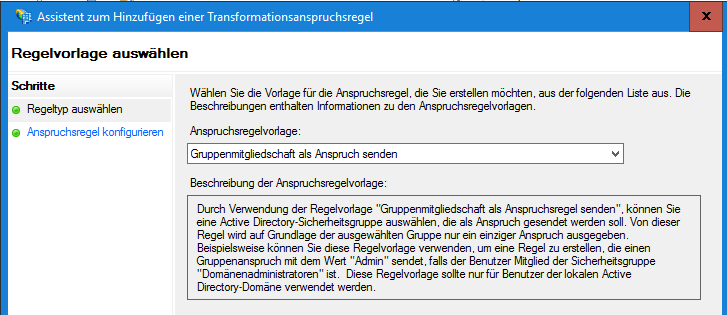
If group mapping is to be used, please configure corresponding AD groups for the FTAPI groups. Under Add Rule..., select Send Group Membership as a Claim.
- Claim rule name: Free text, should correspond to the group
- User's group: The local AD group
- Outgoing claim type: Role or Group, depending on the configuration on the FTAPI server
- Outgoing claim value: Name of the FTAPI group
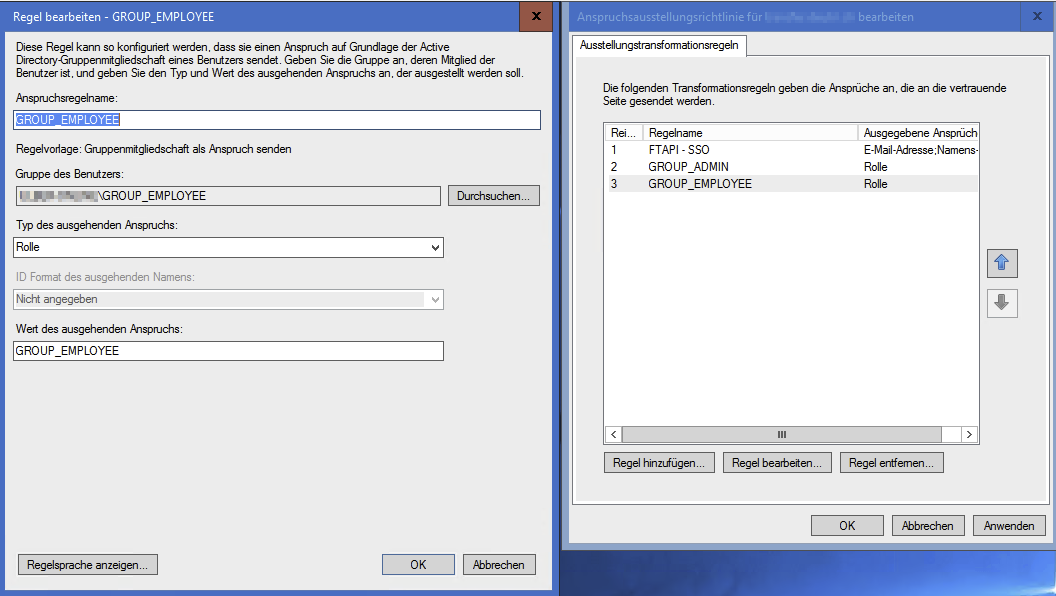
The predefined FTAPI groups Administrator, Employee, and Guest have the internal designations GROUP_ADMIN, GROUP_EMPLOYEE, and GROUP_GUEST. For your own FTAPI groups, enter these under Outgoing claim value.
Add all required groups and click Apply.
Adjusting the Token Lifetime
The validity period of the SAML authentication token is controlled via the Web SSO lifetime; the default value is 480 minutes. The value can be increased to a maximum of 9999 minutes (approx. one week).
Enable Message Signing (Encrypted Assertion)
For the Single Sign-On procedure via SAML to continue working for the FTAPI platform, the encrypted assertion must be active.
Related Articles
❓ SSO: Adjusting token lifetime on the ADFS server via PowerShell and console
❓ SAML IDP configuration for encrypted assertions