
📋 SecuForms: Create online forms, configure layout and recipients
Create and configure SecuForm
FTAPI online forms (= SecuForms) can be created and configured quickly and easily in the web interface.
To create a SecuForm, navigate to the "SecuForms" tab in the top navigation bar and then click on "Configuration". On the right, there is a plus icon. Click on this to create a new SecuForm. In the next step, a window will open where you can assign a name for the new online form and complete the process by clicking on "Create" to generate the SecuForm.
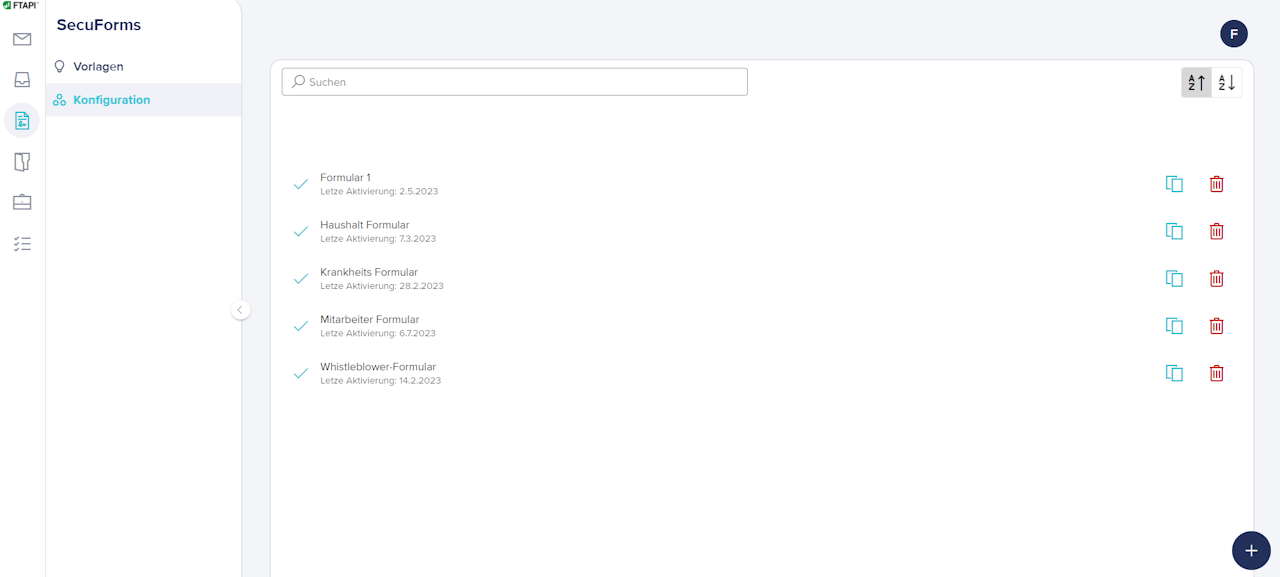
Below you will find all available configurations that are available after creation:
Settings
To configure a new or existing SecuForm, first navigate to the "SecuForms" tab and then select the "Configuration" option in the menu on the left. Select the SecuForm for which you want to make a configuration.
After clicking, you will land in the SecuForm configuration and can select the following areas and make settings:
General settings
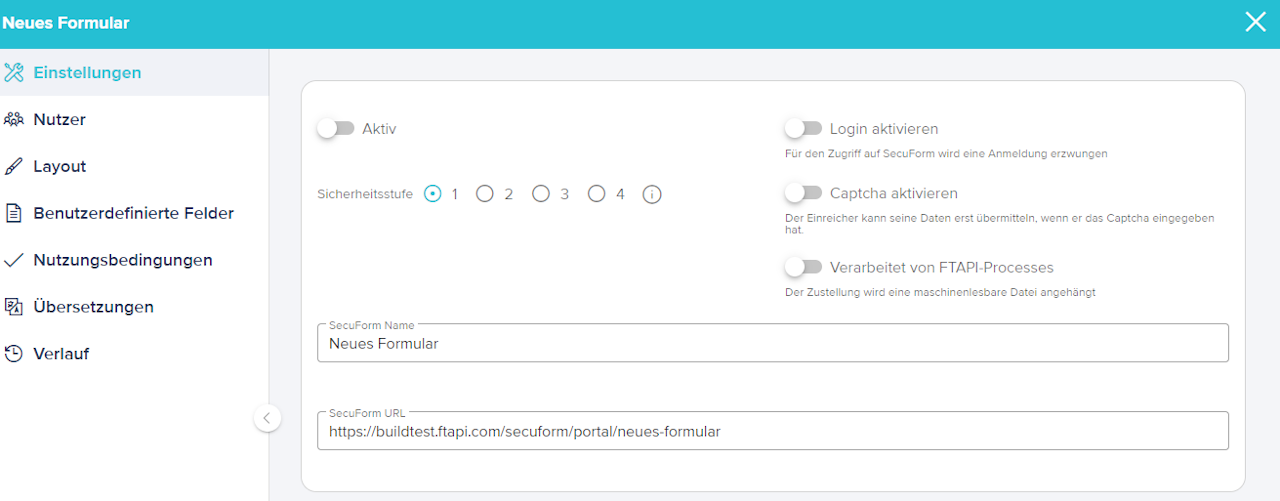
Security level: This setting determines the security level with which the submission is transmitted. This setting is only relevant for the recipient, as the submitter (at levels 3 and 4) does not need a SecuPass-Key. Important: levels 3 and 4 can only be selected if the recipients have an active SecuPass-Key.
Activate login: This function forces the user to log in with an already registered FTAPI account in order to use the SecuForm.
Activate captcha: Use this function to activate a captcha on the SecuForm page.
Processed by FTAPI Processes: If you activate this option, a JSON file is automatically generated upon submission, which can be processed by FTAPI-Processes.
SecuForm Name: The name of the SecuForm is displayed in the WebUI, among other places, and is used for the initial creation of the link.
SecuForm URL: The URL to access this SecuForm can be adjusted here.
Users (sender and recipient)
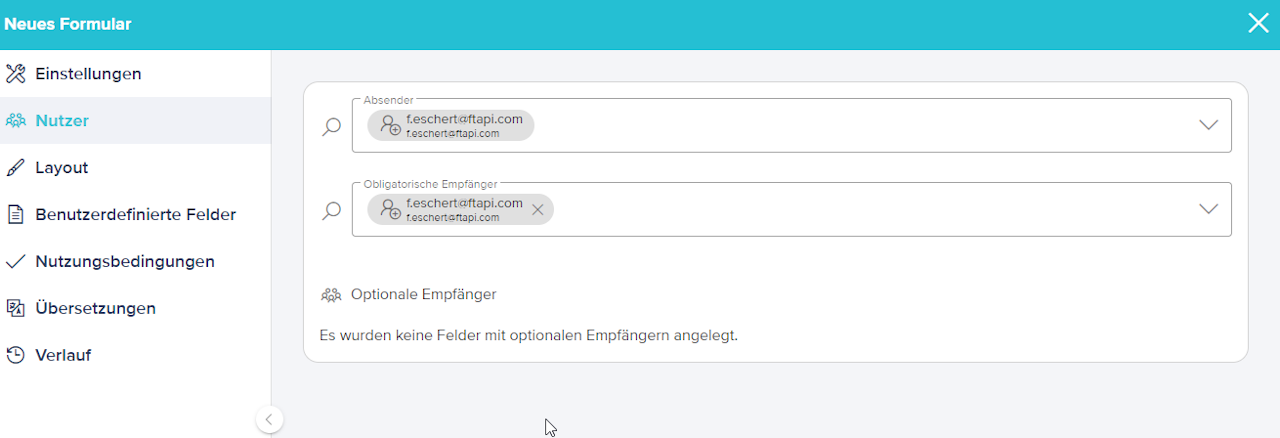
Sender: Every SecuForm submission is sent via a technical account. This account is displayed as the "sender" for the recipients of the SecuForm. The sender must be a licensed FTAPI user and have their SecuPass-Key activated.
Mandatory recipients: Users you enter here are fixed recipients. The submitters do not see them.
Optional recipients: Users you enter here are variable recipients. The submitter is given the option to select them individually.
Layout
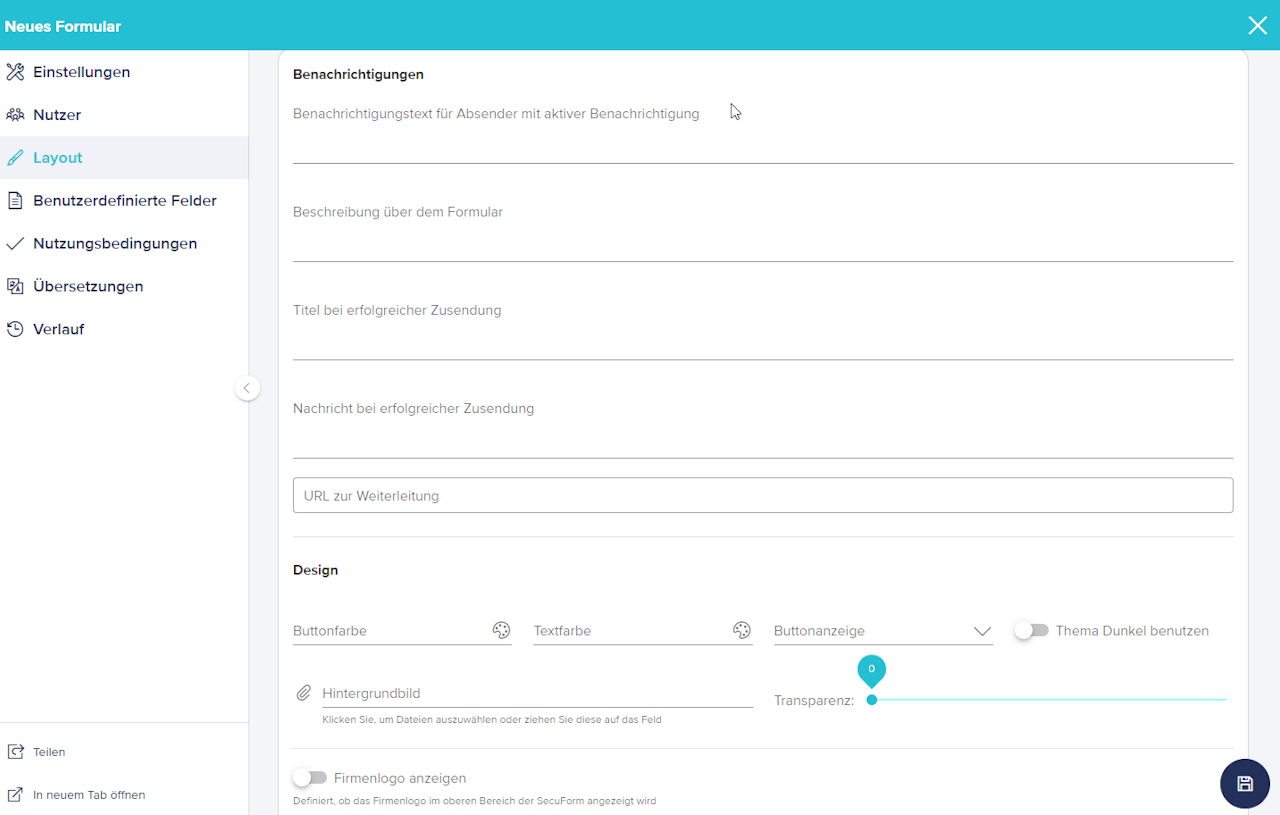
Notification text for senders with active notification: Defines the text for the confirmation email that the submitter receives.
Description above the form: Here you can define the description that the submitter sees on the web interface below the SecuForm name.
Title / message upon successful submission: These texts appear as soon as the submitter has successfully completed a submission.
Redirect URL: You can redirect submitters to this URL after a successful submission.
Button color / text color: Defines the colors of the buttons and their text.
Use dark theme / transparency / background image / company logo / activate footer: Layout options for the visual customization of the SecuForm.
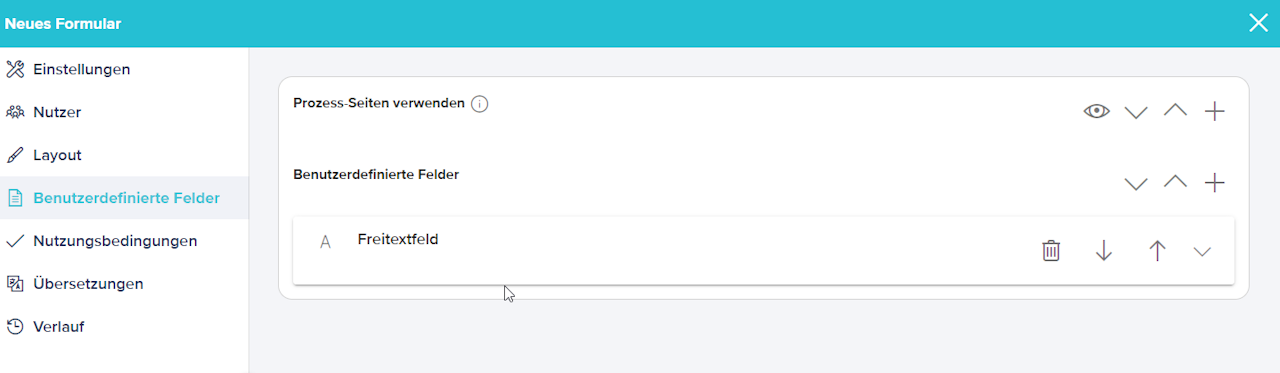
Custom fields and terms of use
Use process pages: The SecuForm can be divided into several pages.
Custom fields: Create a new field. You can choose between various field types.
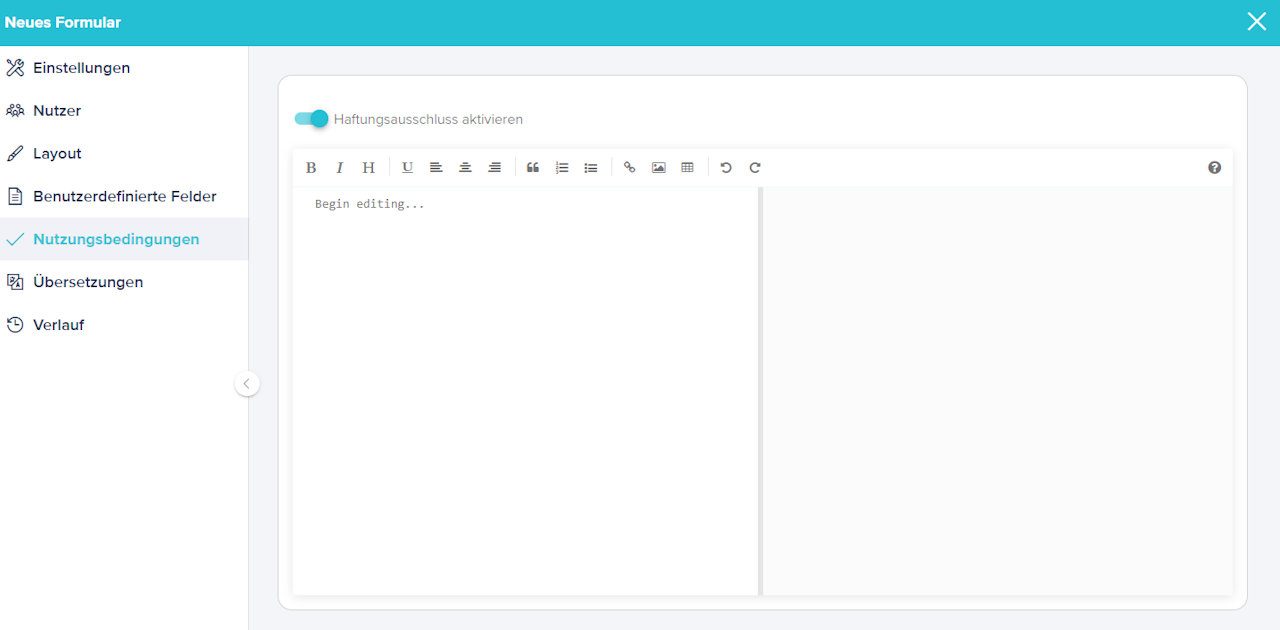
Activate disclaimer: When activated, the disclaimer page is displayed before every submission.
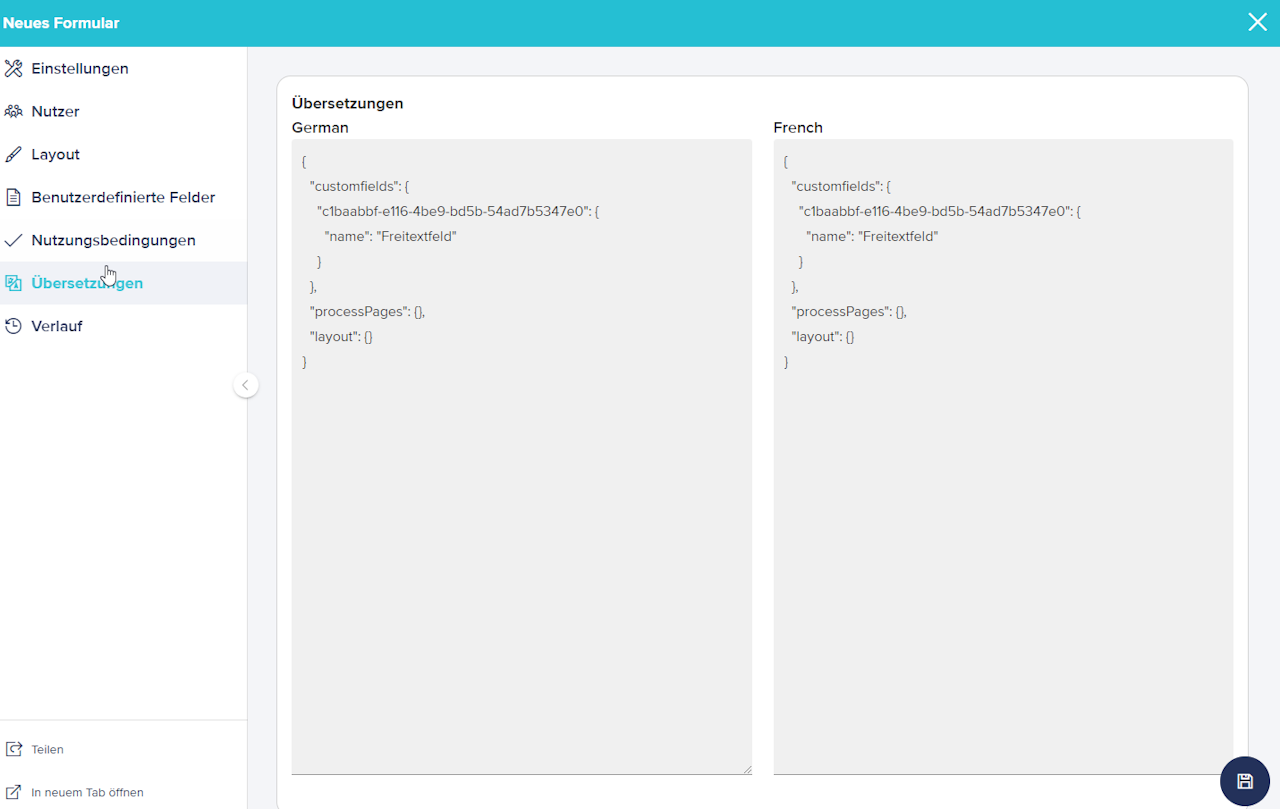
Translations and history
Translations: Here you can set the individual translations for the fields and texts.
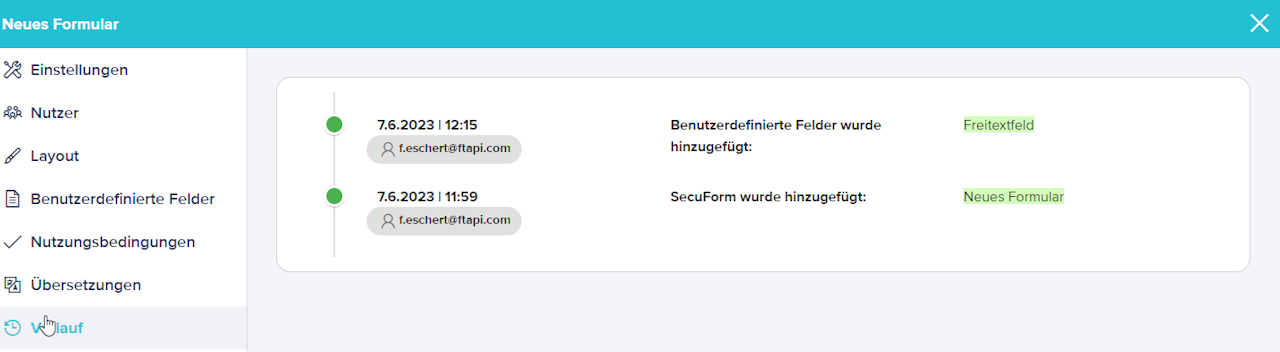
History: Here you can chronologically track which changes were made to the SecuForm.
Related articles
📋 SecuForms: Best practices for SecuFlows integration and PDF mapping